
Canning is an ideal way to preserve foods that aren’t suitable for dehydration (and even some that are). Often, canning is associated with Grandma’s delicious raspberry preserves or her still-tastes-garden-fresh tomato sauce. However, the art of canning has come a long way, and a multitude of foods can be kept not only tasty, but nutritious, via processing them into cans for later consumption.
Another benefit of home canning is knowing exactly what’s in the foods you can—which can’t be said of canned goods you purchase at the market! With home canning, you can rest easy knowing that what comes out of the jar is exactly what you put into the jar, and that there isn’t any questionable BPA-laden liner in the can you used to preserve your food. You did it all yourself, so there aren’t any what-ifs to worry about.
Whether you’re interested in canning food in order to feed your own family, or you’re canning up homemade deliciousness to give as a long-lasting holiday gift, use this guide to get started. Making wholesome food that lasts a long time is easier than you think!
Types of home canning: water bath vs. pressure canning
There are two basic types of home canning: water bath canning and pressure canning.
Water bath canning can be done with only certain types of foods—those that are high in acid content—and as such, is somewhat limited in its scope.
Pressure canning allows the user to can up foods that are low in acid content, allowing for a broader range of foods to be preserved.
While water bath canning relies on the power of boiling water to seal up the jars being canned, pressure canning uses high-temperature steam to seal the jars. The higher temperature also prevents botulism toxin from living within the jars, meaning that you can safely can foods prone to botulism (like meats and green beans) with pressure canning—something that boiling water bath canning is unable to do.

Supplies you’ll need for canning
Whether you’re bathing in boiling water or using the power of pressure to can up food for later consumption, there are a few basic supplies that make things a lot easier. For both water bath and pressure canning, have the following items handy:
- Jars with lids and bands (I use Ball brand)
- The food to be canned (of course!)
- Several clean, dry dish towels
- A large cutting board
- A canning rack that fits your canner
- A jar lifter

Some items that aren’t 100 percent necessary but make canning a quicker and easier experience are:
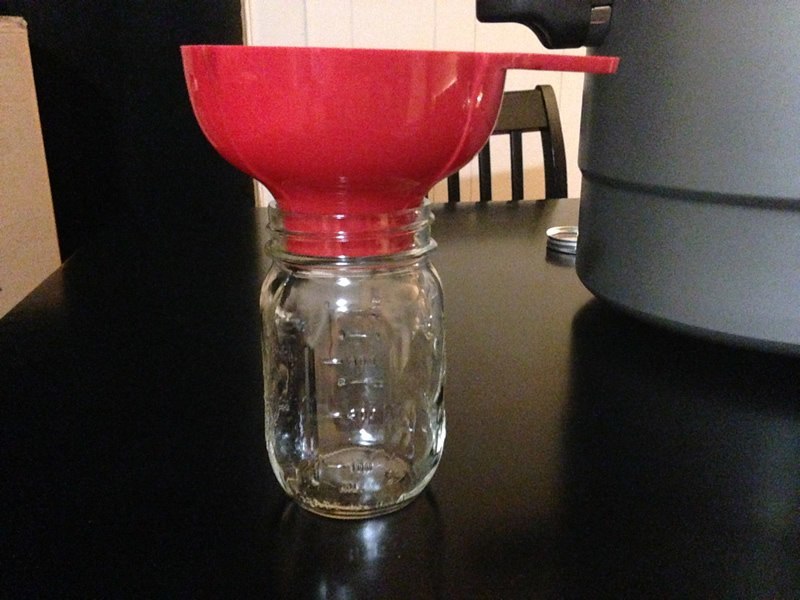
- A funnel (not necessary, but so useful for keeping tidy!)
- A thin, rubber spatula (so helpful for removing air bubbles prior to processing)
- A magnetic lid lifter for removing hot lids from simmering water with ease
- A few extra pots with hot water for holding jars and lids until processing time
Water bath canning supplies
Water bath canning can be done without having to go out and buy a special canner. Apart from the items listed above, all you’ll need is a large Dutch oven or stock pot with a secure lid and a rack that fits snugly in the bottom. Even someone who has never canned before might already have the most important supplies in their cupboards!
Pressure canning supplies
If you’re going the pressure canning route, you will need to purchase a pressure canner. You can get dial-gauge canners that are able to adjust pressure in a fine-tuning manner just by turning a pressure-controlling dial on the lid, or you can get a weighted-gauge canner that require the user to place small weights onto the canner’s steam valve in order to regulate pressure during processing. Both types work quite well when it comes to food flavor, shelf life, and safety, but many beginners like the convenience of the dial-gauge.
Note: Please research canners carefully before making a purchase. Many people buy a canner only to have to return it to the retailer because the canner is not suitable for use on their stove. Most canners will work with gas ranges; however, if you have an electric range—be it coil burner or flat-top—do your due diligence to ensure that the canner you choose is compatible with your stove burner.
Once you’ve chosen your canning method and obtained your supplies, it’s time to get canning!
Recommended Pressure Canners
| Flat Top | Gas Top | Coil Top | Glass Top | Product | Feature | List Price |
|---|---|---|---|---|---|---|
| | | | | All American 21-1/2-Quart Pressure Canner |
|
$368.00 |
| | | Presto 16-Quart Aluminum Pressure Canner |
|
$109.99 | ||
| | | | Presto 23-Quart Pressure Canner |
|
$109.99 | |
| | | | | Granite Ware Pressure Canner, 20-Quart |
|
$112.95 |
Water bath canning basics
You’ve got your supplies, you’ve got your recipes, and you’re ready to go—now what?
Follow recipes to the letter
Be steadfast about following recipes, and only use recipes that are tried-and-true for water bath canning. If you use a canner designed specifically for water bath canning, follow the instructions and cooking/processing times included with the device.
Use the rack in the bottom of the canner—always
Always use your canning rack in the bottom of your canner. This prevents breakage of jars (and thus, prevents wasted food) and also promotes getting a good, solid seal on your jars.

Use enough water
During your entire boiling time, water must cover your jars by one inch or more to ensure correct and safe processing. If at any time the water level falls below one inch, you may add more boiling water to the pot. Please note that if the water ceases to boil at any time, you must start your processing time fresh from the beginning—this is why it’s important to use enough water to maintain a high enough water level during the whole processing time.
Pressure canning basics
Pressure canning is a slightly different beast from water bath canning, and it allows for more versatility as far as food types are concerned. If you want to can stews, soups, meats and beans, pressure canning is the way to go. Get everything together and get ready to can!
Follow all instructions carefully
Just as with water bathing, it’s important to follow all instructions pertaining to your canner carefully. One missed step could mean safety risks, including botulism poisoning down the road. Follow all recommendations as outlined in the instruction manual for your canner and adhere closely to all recipes, making doubly sure they are suitable for foods to be canned.
Make sure to exhaust the canner completely before you begin the processing countdown
Although it’s understandable to be eager to get underway, make sure you exhaust your pressure canner completely before you begin the timer for food processing. With my weighted-gauge canner, steam has to be flowing in a steady stream for 10 full minutes before I can place the weights and start the clock for processing. Steam typically erupts from the exhaust valve in fits and starts for several minutes before it begins a steady flow. Proper venting ensures a tight seal and food safety for pressure canning.
Do not open a canner that is still pressurized!
Make absolutely certain your canner is totally de-pressurized before unlocking the lid and opening it to remove processed jars. Most newer models feature a locking mechanism that will not allow the lid to open until all pressure has been released. However, if you’re using an older model, you’ll have to be responsible for waiting out the decompression time—usually at least 10-15 minutes.
Finishing touches for both methods
When you’re done processing and it’s time to remove the jars from the canner, remove them using a jar lifter to protect yourself from burns. Line a large cutting board with a dish towel and place the jars onto this surface to cool. Make sure the area you are cooling your jars is tucked away from any fans, open windows, or other sources of drafts, as this can cause problems like cracked jars and poor sealing, rendering the food unsafe to eat. Allow for an inch or so between jars to allow even air circulation. When a day (24 hours) has passed, test the seals by depressing the lids right in the middle. If there is no give, the seal is likely just as it ought to be! If it pops up and down, you may need to re-process the jars, as a popping lid indicates a bad seal. It may take some practice getting your method down and getting the seal just right, so don’t lose heart if you have a few “poppers” at first! Just keep practicing and adjusting your method and you’ll get good seals before you know it.
The canning FAQ
A lot of novice canners can feel overwhelmed by the vast amount of information available on canning that is out there on the internet and in self-published e-books on the topic (and often, the information is conflicting!). This can bring up a lot of questions. Here are some solid answers to some frequently asked questions about home canning:
[toggle title=”How long will canned foods keep?” load=”hide”]
Some people swear that canned foods can keep for decades, while others will tell you they become unsafe after just a few months. I think the answer lies somewhere in between: a year from processing date is something of a “best by” date when it comes to flavor and nutritive value. However, canned foods won’t instantly become inedible a year and a month after processing. Use your best judgment—if the food smells or looks “off,” toss it out and reach for a “younger” can.
[/toggle]
[toggle title=”My grandmother canned meats using a water bath and we never got sick. Can’t I do this as well?” load=”hide”]
Well, you could—but there’s no guarantee it would be safe. The high-temperature environment of a pressure canner is needed to ensure that meats are processed safely, without risk of botulinum contamination. Some people say water bathing for three or more hours renders a good seal and eliminates bacteria, but boiling temperatures are not sufficient to kill off botulinum. If you want to can meats, the only established safe way to do so is with a pressure canner.
[/toggle]
[toggle title=”May I can food made from an old family recipe?” load=”hide”]
It depends. Check the recipe to make sure that there are no “forbidden” ingredients (discussed below). You may be surprised to find out how similar an old family recipe for, say, vegetable beef soup, is to an approved-for-canning recipe provided by the canning experts. Do your research and can accordingly! If the old family recipe can’t be canned, try freezing instead.
[/toggle]
[toggle title=”What foods should never be preserved by canning?” load=”hide”]
Avoid canning up recipes using the following ingredients:
- Excessive fats and oils
- Dairy products or anything containing them (they will spoil even after being processed)
- Any thickeners (including pastas, grains, flours, starches, etc.)
- Lettuce, broccoli, artichoke, summer squash, avocados, bananas or any mashed vegetables (some of these are okay to pickle, though!)
- Eggs
- Duck meat or paste
- Any livers or giblets
- Any meats containing fillers
Your best bet is to use tried-and-true recipes specifically for foods to be canned. That way, you can avoid spoiling a whole batch of cans with just one “no-no” ingredient.
[/toggle]
[toggle title=”Are there any tips for speeding up the canning process?” load=”hide”]
Yeah: don’t do it!
If you try to speed the cooling process, you could wind up with faulty seals and broken jars, thus defeating the purpose of canning altogether. Even something as seemingly innocuous as a draft from a window could lead to cracked jars and lids popping up. When you take the time to cool off your jars properly by placing them on a dish towel on top of a wooden cutting board away from drafts for a full 24 hours before testing the seals, you can be assured that the canned goods you make will be wholesome and will keep for a good, long time. When you try to rush the process, you may wind up having to re-process, thus doubling the time you spent rather than saving any at all!
[/toggle]